Custom LED Lighting: How to Safely and Legally Light Up Your Ride
Most riders think adding custom LED car lighting Indianapolis means risking a ticket or worse. You want to brighten your rig with LED underglow installation or interior car lights without crossing legal lines. This guide breaks down how to light your vehicle or bike safely, keeping style and rules in check. Stick around to learn what works on the road and what doesn’t.
Why Custom Lighting Makes Sense for Your Ride
You’ve probably seen those jaw-dropping builds at car shows or cruising down the street at night. Custom LED car lighting Indianapolis isn’t just about looking cool (though that’s a big part of it). It’s about making your vehicle truly yours while improving visibility and safety when you’re out after dark.
Think about it. When you’re loading gear into your truck bed at night or trying to find something in your car’s footwell, factory lighting just doesn’t cut it. Interior car lights give you practical illumination exactly where you need it. And if you’re into off-roading or late-night cruises, the right lighting setup can make all the difference.
The best part? Lighting upgrades don’t require a complete rebuild of your ride. Whether you’re working with a classic muscle car, a modern truck, or a bagger motorcycle, there’s a lighting solution that fits your style and budget.
Understanding the Legal Side of Custom Lighting
Let’s get the serious stuff out of the way first. Every state has different rules about vehicle lighting, and Indianapolis has its own set of regulations you need to know about. Don’t worry, it’s not as complicated as it sounds.
What’s Legal and What’s Not
In most places, including Indiana, you can run custom LED car lighting Indianapolis as long as you follow some basic rules. Interior car lights are almost always fine since they don’t distract other drivers. You can light up your cabin, footwells, and dashboard without any issues.
LED underglow installation gets a bit trickier. Many states allow underglow as long as the lights aren’t red or blue (those are reserved for emergency vehicles). Some areas also restrict flashing or strobing patterns. The key is making sure your underglow doesn’t mimic police or emergency vehicle lighting.
For custom motorcycle lighting, the same principles apply. You want lights that enhance your visibility without confusing other drivers about your intentions. Brake lights stay red, turn signals stay amber, and headlights stay white or yellow.
Off-road light bars are great for trails and private property, but most states require you to cover them or turn them off when driving on public roads. That super bright light bar might be perfect for navigating rough terrain, but it can blind oncoming traffic on regular streets.
Getting It Right from the Start
Before you buy anything, check your local regulations. A quick call to your local DMV or a chat with a professional installer can save you from headaches down the road. Many shops that specialize in custom LED car lighting Indianapolis know the local laws inside and out.
Here’s a pro tip: keep your lighting system on separate switches. That way, you can turn off any questionable lights when you’re on public roads and fire them up at shows or private events.
Interior Car Lights That Transform Your Cabin
Ready to brighten things up inside? Interior car lights offer the most flexibility because you’re not dealing with as many legal restrictions. Plus, the installation is usually straightforward enough for a weekend DIY project.
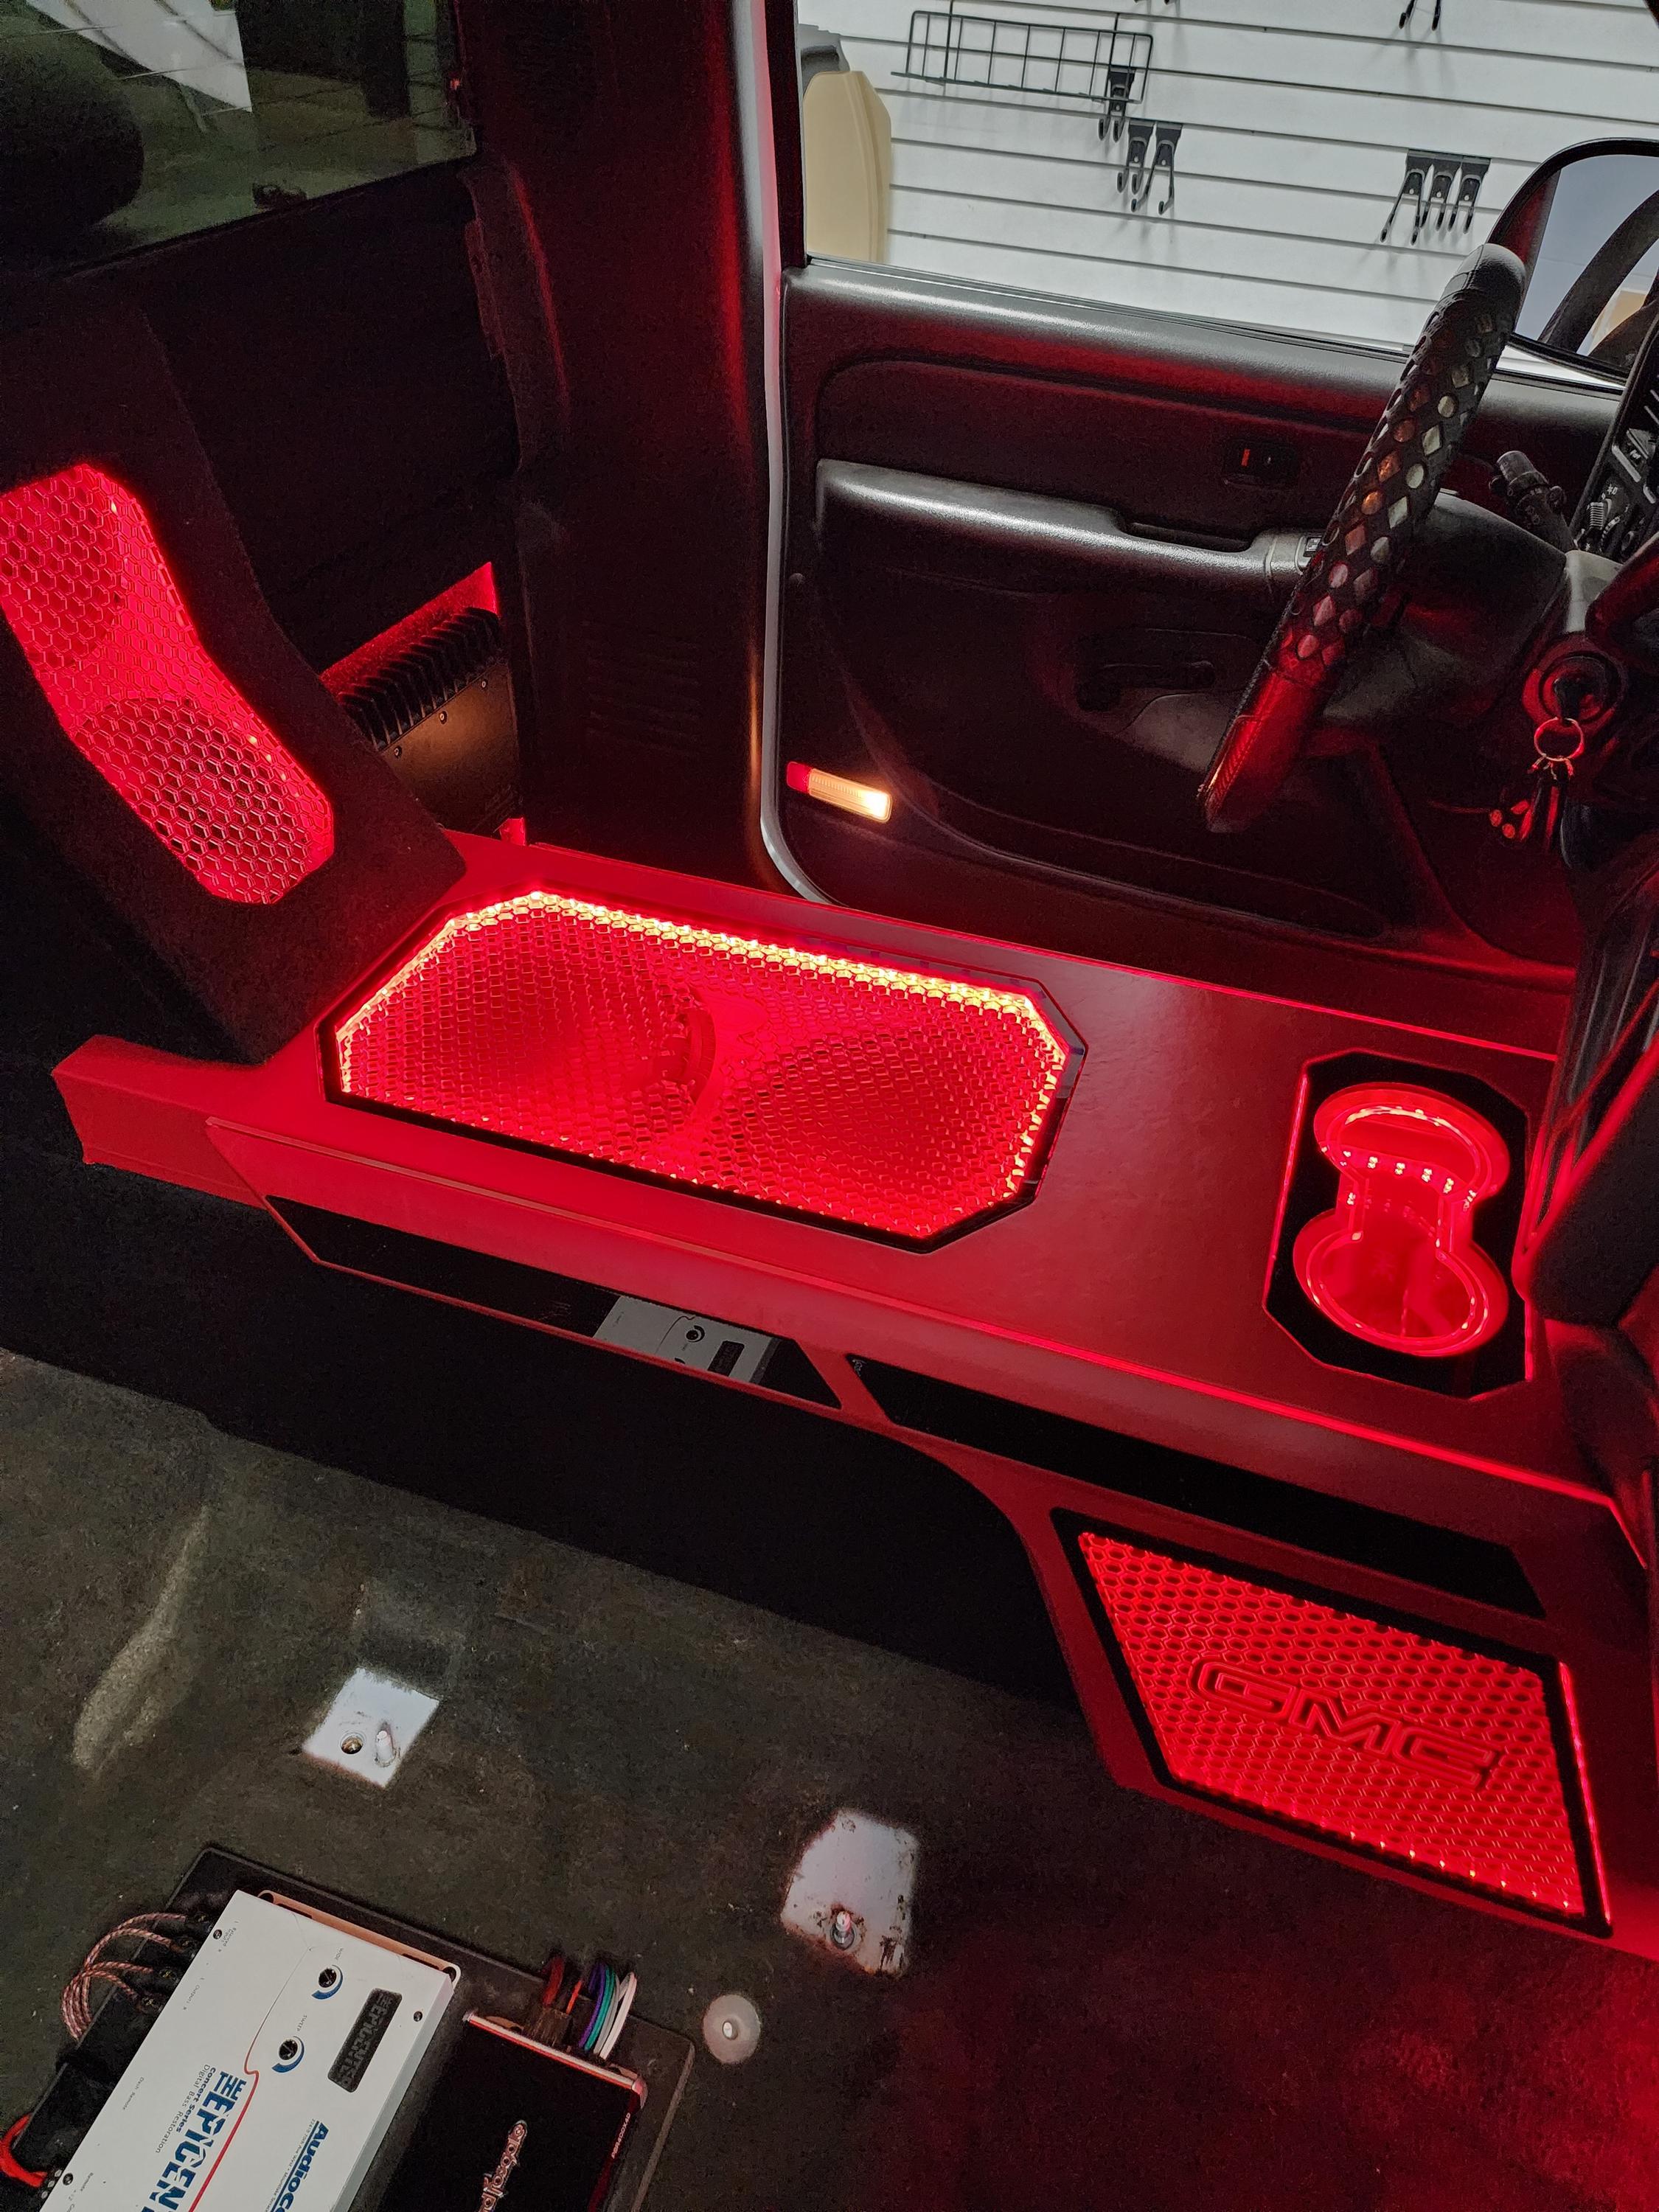
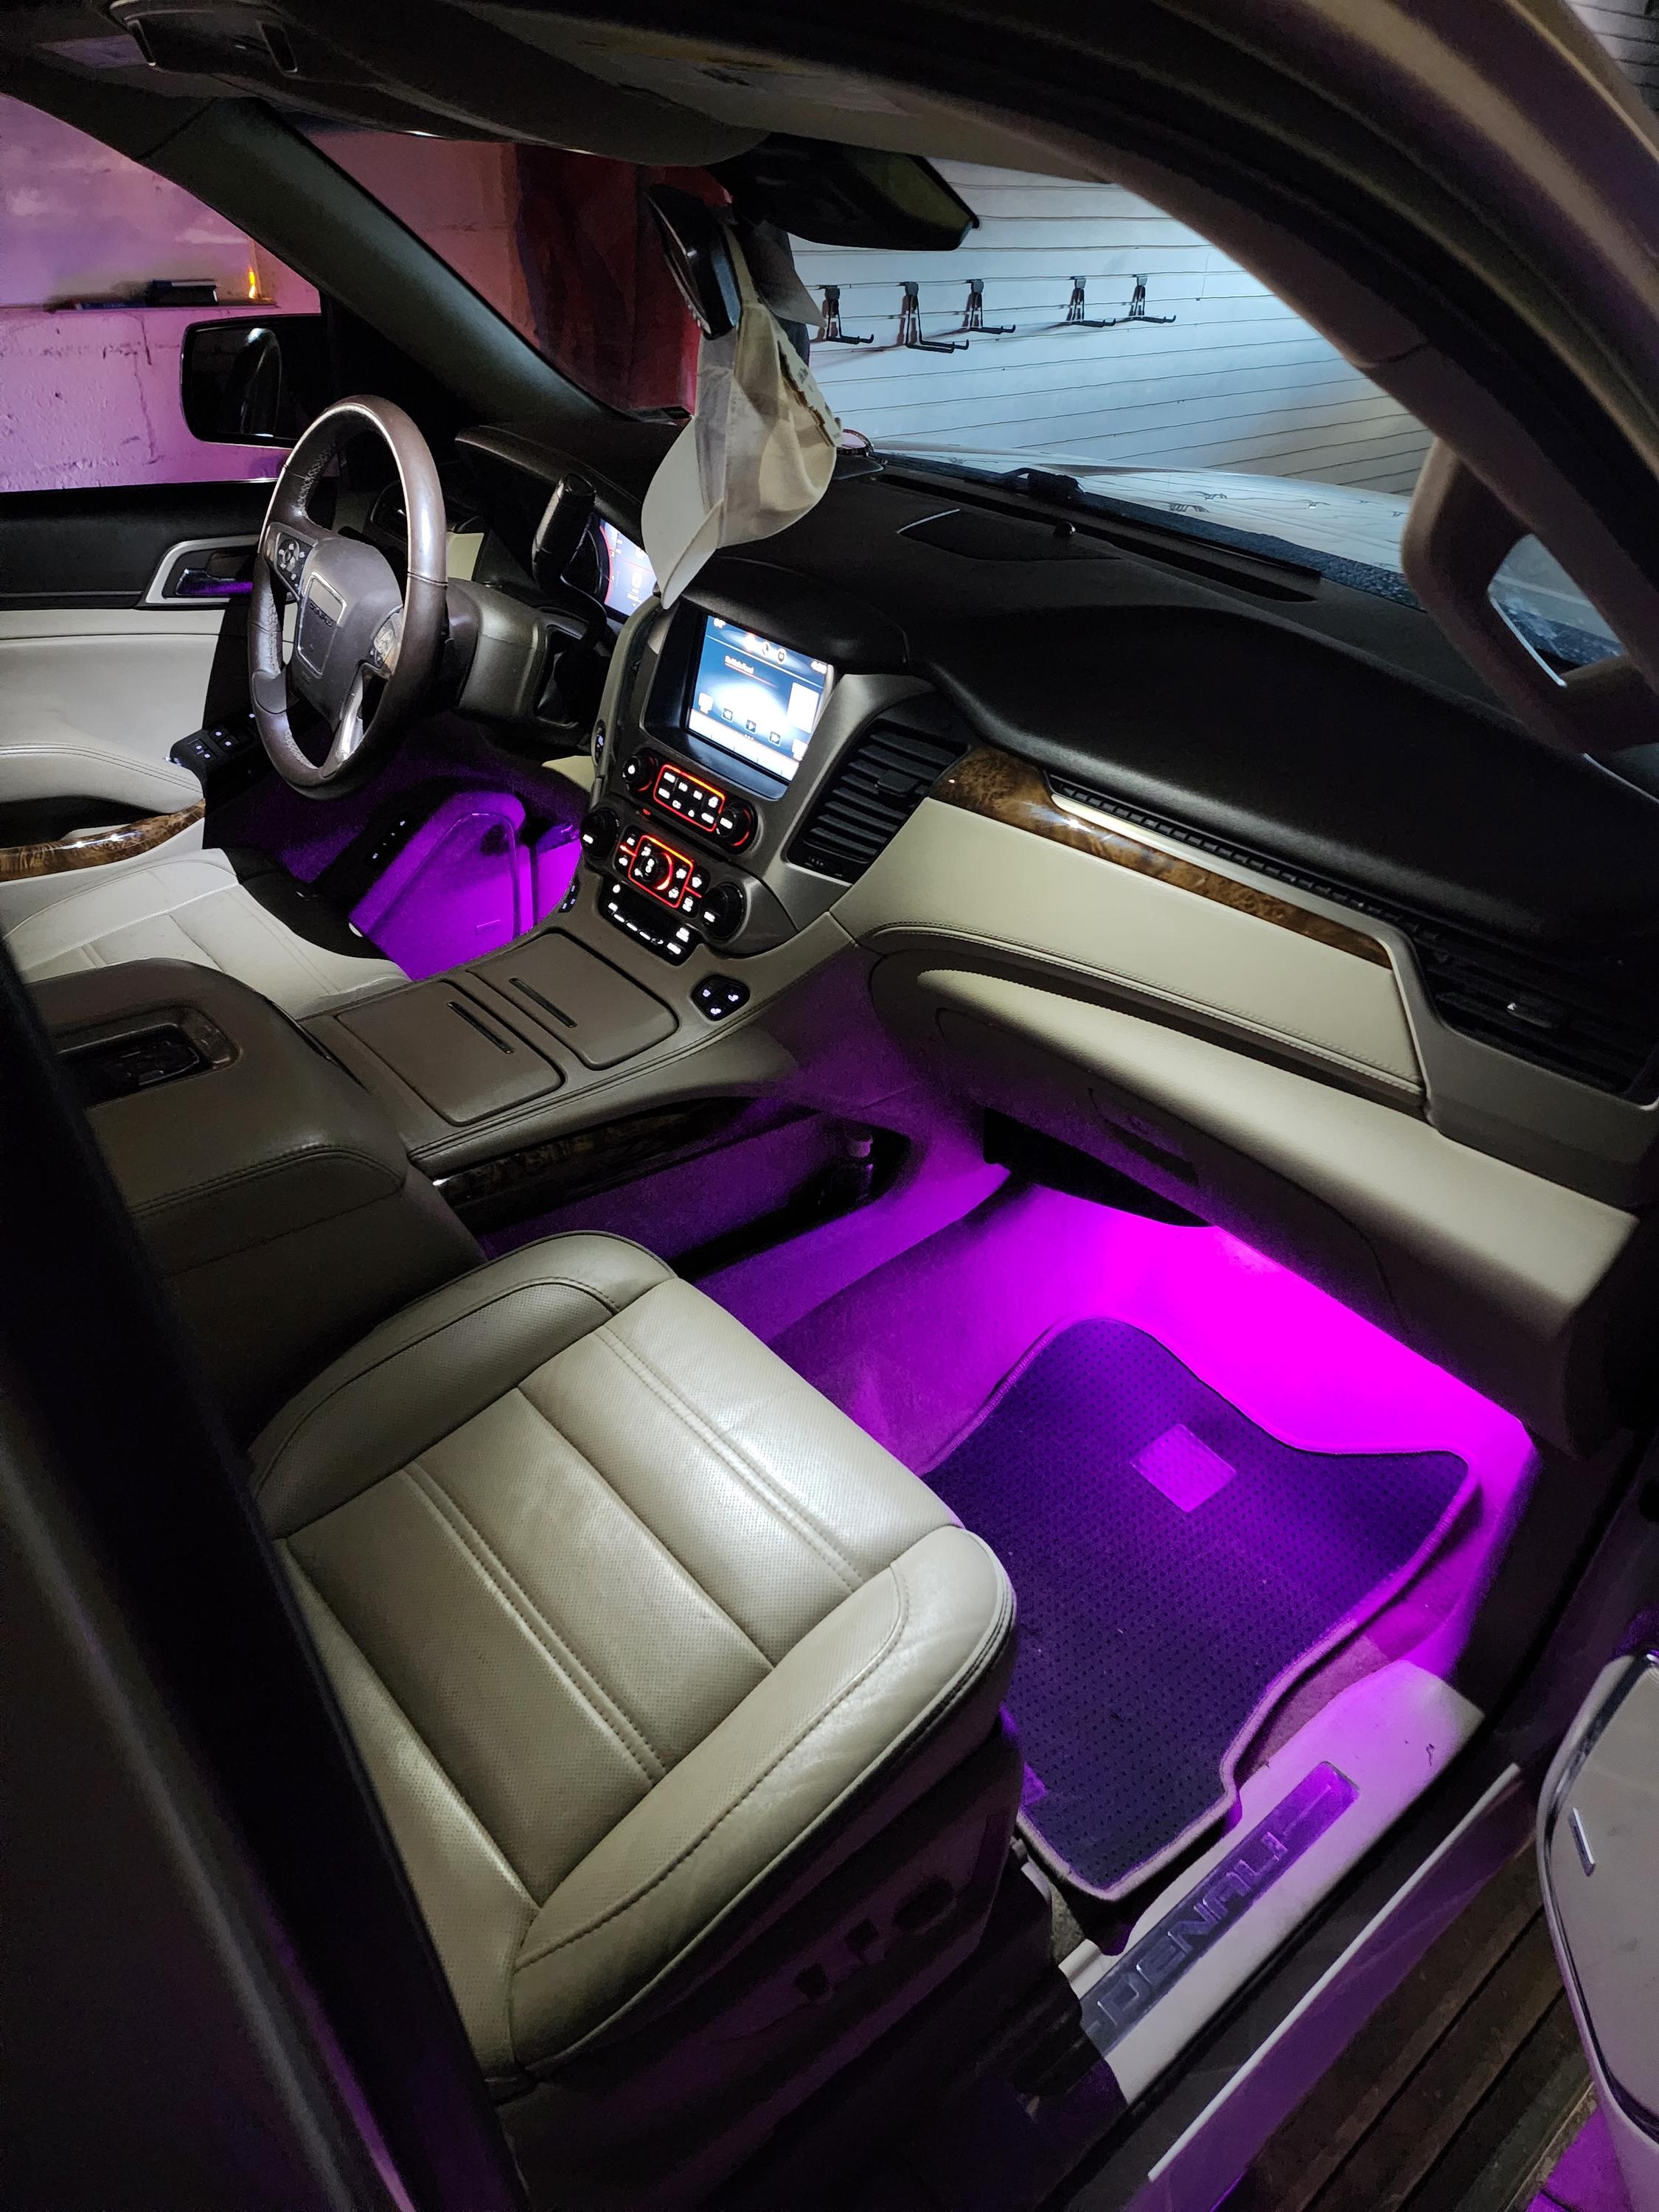
Footwell Lighting
Footwell lights are where most people start, and for good reason. They add a subtle glow that looks amazing at night without being distracting while you drive. You can match them to your dashboard lighting or go with a color that complements your interior.
Installing footwell lights is pretty simple. Most kits come with adhesive-backed LED strips that you stick under the dashboard. Run the wires to your fuse box, connect them to a circuit that turns on with your parking lights, and you’re done. Takes maybe an hour if you’re taking your time.
Want to get fancy? Grab a kit with a remote control or smartphone app. You can change colors based on your mood, sync the lights to your music, or set them to pulse with your turn signals.
Dashboard and Gauge Lighting
Swapping out your factory gauge lights for custom LEDs can completely change your interior’s vibe. White LEDs give a modern, high-tech look. Blue or green creates a cool, relaxed atmosphere. Red is perfect if you’re going for that race car feel.
This upgrade requires a bit more work since you’ll need to remove your gauge cluster. If you’re not comfortable with that, a professional shop can knock it out in a couple of hours. The result is worth it, especially if your factory bulbs are dim or mismatched.
Door Panel and Cup Holder Accents
Small touches make a big difference. LED strips in your door panels light up when you open the doors, making it easier to get in and out at night. Cup holder lights help you find your drink without taking your eyes off the road for too long.
These additions are super easy to install. Most use USB power or tap into existing circuits. You can find kits specifically designed for popular vehicle models, or get universal strips and customize the placement yourself.
LED Underglow Installation for That Show-Stopping Look
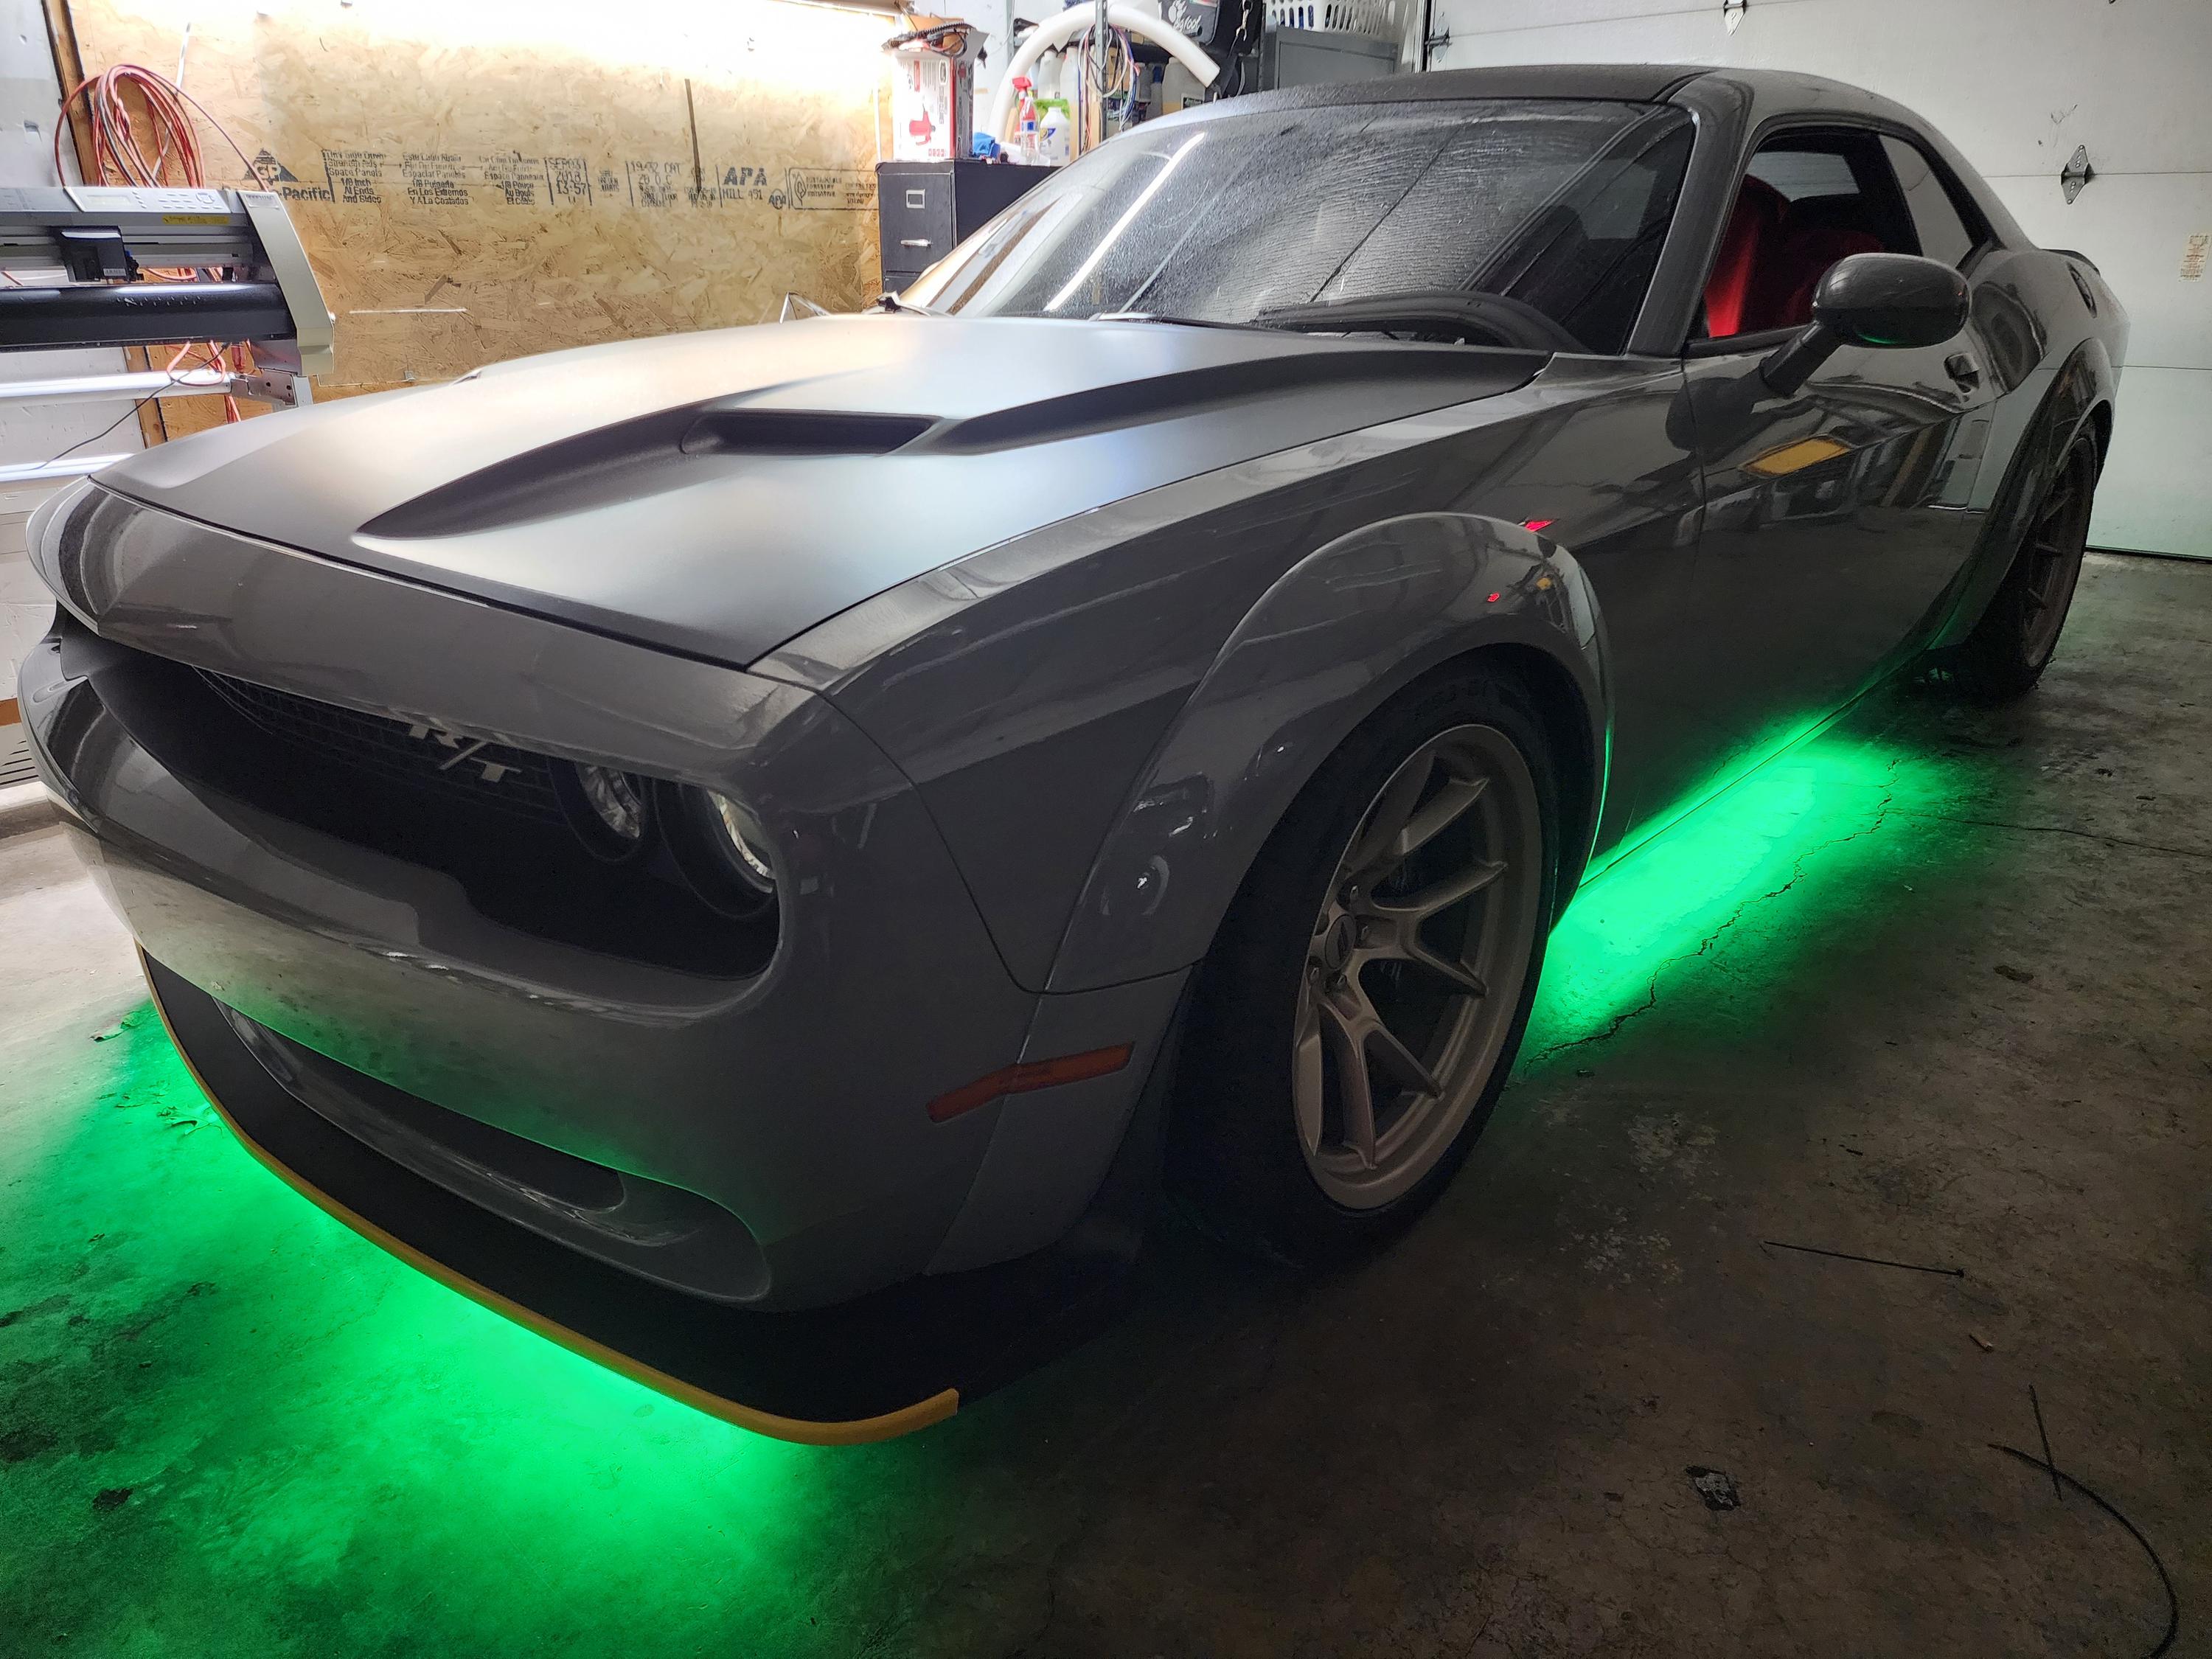
LED underglow installation is where things get really fun. Nothing turns heads like a car or truck floating on a cloud of colored light. But you want to do it right so it looks professional and lasts.
Choosing the Right Underglow Kit
Not all underglow kits are created equal. Cheaper kits might save you money upfront, but they often use lower-quality LEDs that fade or fail quickly. Look for kits with waterproof ratings (IP67 or higher) since they’ll be exposed to road spray, rain, and snow.
Tube-style underglow gives you that classic neon look with modern LED reliability. Strip-style underglow offers more flexibility in placement and is easier to hide. Some kits combine both for maximum coverage and impact.
Color options matter too. Single-color kits are less expensive and often brighter. RGB (color-changing) kits let you switch things up whenever you want. Some advanced systems even let you create custom patterns and animations.
Installation Tips for Best Results
Clean mounting surfaces are critical. Use rubbing alcohol to remove any dirt, oil, or wax before sticking down your LED strips or tubes. This ensures they stay put even when you’re hitting bumps or washing your car.
Route your wires carefully. Keep them away from hot exhaust components, sharp edges, and moving parts. Use zip ties or wire loom to keep everything tidy and protected. Take your time with this step because fixing a damaged wire later is a pain.
Mount your control box in a dry, accessible location. Many people put it under the driver’s seat or in the trunk. You want it protected from moisture but easy to reach if you need to troubleshoot or adjust settings.
Test everything before you finish the installation. Turn on each section of lighting to make sure it works and looks the way you want. It’s much easier to make adjustments before you’ve tucked all the wires away and reinstalled trim panels.
Maintaining Your Underglow System
Check your underglow regularly, especially after driving in bad weather or off-road. Look for loose mounting points, damaged wires, or moisture in the control box. Catching small issues early prevents bigger problems later.
Keep your lights clean. Road grime and brake dust can dull the output over time. A quick wipe-down when you wash your car keeps them looking bright and fresh.
Custom Motorcycle Lighting for Baggers and Beyond
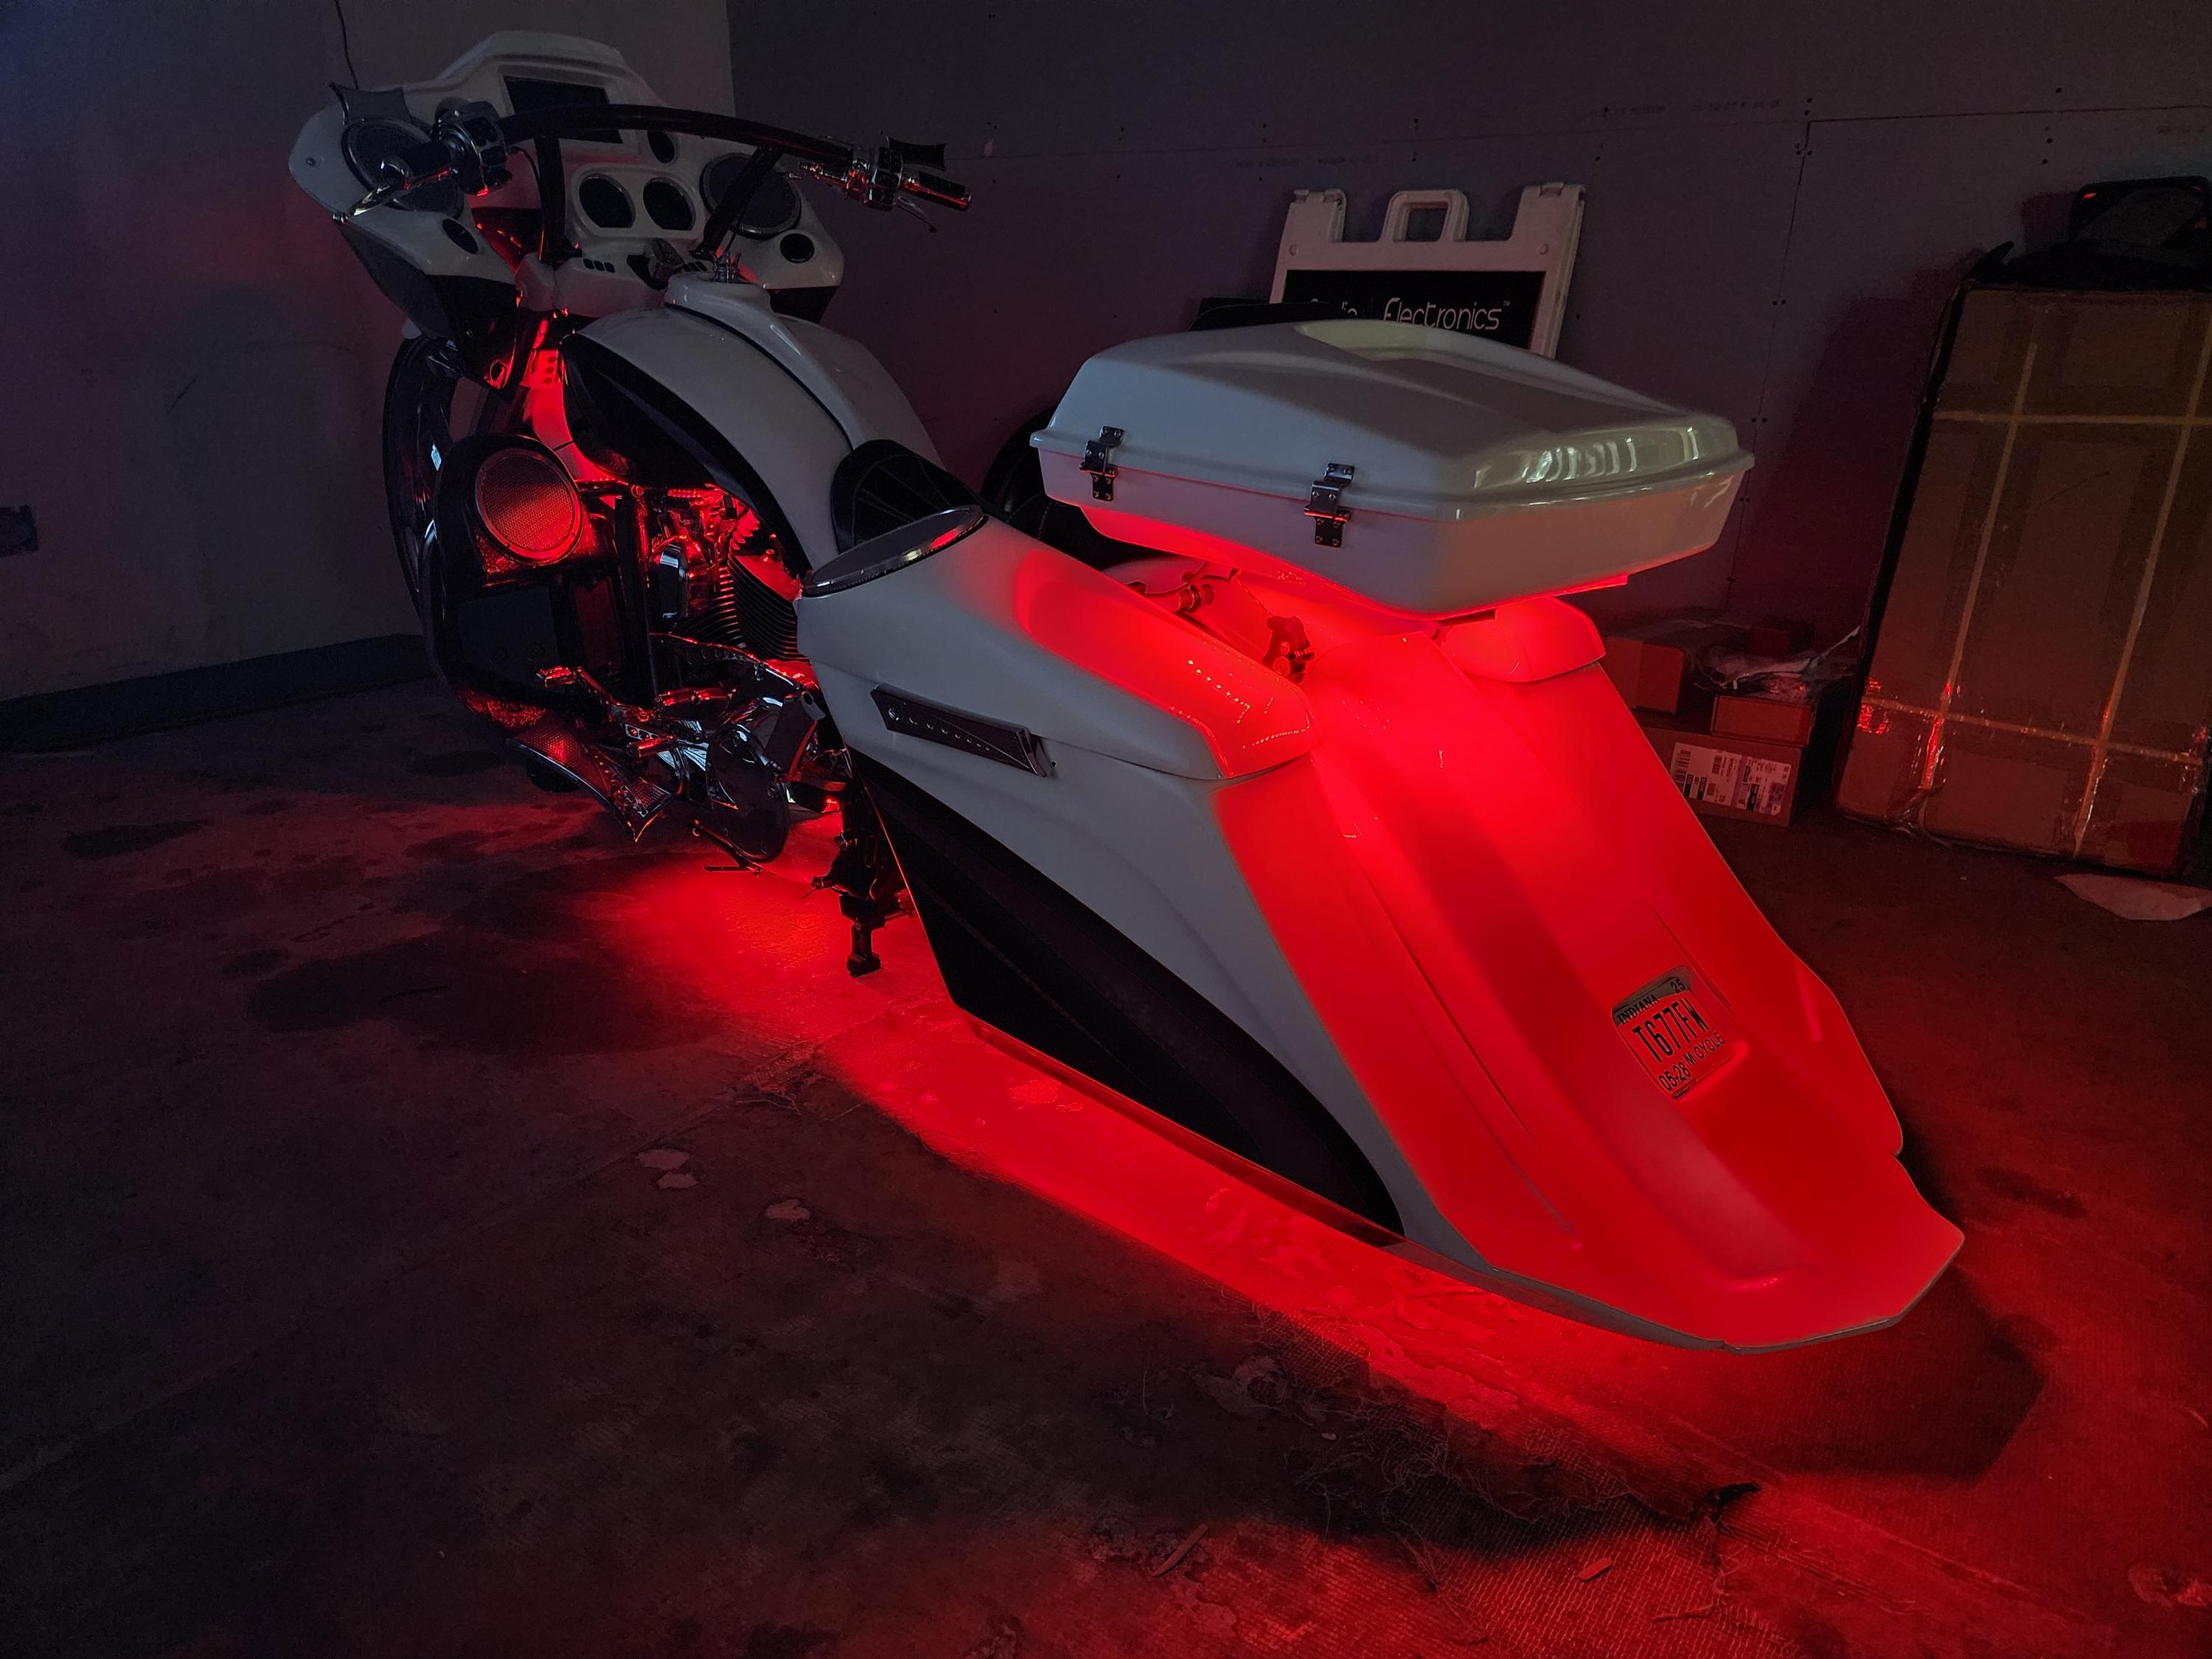
Custom motorcycle lighting serves double duty. It makes you more visible to other drivers (which is huge for safety) and gives your bike a unique personality. Baggers especially benefit from well-planned lighting setups.
Accent Lighting for Engine and Body
LED strips along your engine cases, frame rails, or saddlebags create depth and highlight your bike’s lines. Cool white or amber lights look classy and don’t overwhelm the overall design. You can also match your accent lighting to your bike’s paint scheme for a coordinated look.
For baggers, lighting inside the saddlebags is super practical. No more fumbling around in the dark trying to find your gloves or wallet. Simple LED strips with magnetic switches turn on when you open the lid and off when you close it.
Wheel and Brake Lighting
Wheel lights are attention-grabbers. LED strips mounted to your wheel rim or spokes create amazing patterns when you’re rolling. Some systems use accelerometers to keep the pattern oriented correctly as the wheel spins.
Brake lights with built-in run/turn/brake functions give you modern LED brightness with plug-and-play installation. Many are designed to fit specific bike models, so you get a clean, factory-looking installation.
Headlight and Auxiliary Light Upgrades
Swapping your stock halogen headlight for an LED unit dramatically improves nighttime visibility. LED headlights draw less power, run cooler, and last longer than traditional bulbs. Plus, the whiter light helps you see road hazards better.
Adding auxiliary lights gives you even more illumination for dark roads or trails. Mount them on crash bars, highway bars, or custom brackets. Just remember to aim them properly so you’re not blinding oncoming traffic.
Off-Road Light Bars for Serious Illumination
If you take your truck or Jeep off the beaten path, off-road light bars are a must-have. They turn night into day on trails and back roads. But picking the right bar and installing it correctly makes all the difference.
Sizing and Placement
Light bars come in sizes from 6 inches to over 50 inches. Roof-mounted bars give you maximum throw distance, perfect for high-speed desert running. Bumper-mounted bars provide more focused light for technical trail work.
Consider your vehicle’s width when choosing bar length. A 50-inch bar might look awesome on a full-size truck but overwhelm a compact SUV. You want the bar to look proportional to your rig.
Combo beams (spot and flood) are the most versatile. The spot pattern throws light far down the trail, while the flood pattern lights up the sides. This combination works well for most off-road situations.
Wiring and Switching
Off-road light bars pull serious amperage, so proper wiring is critical. Use a relay harness rated for your bar’s draw. This protects your vehicle’s electrical system and ensures your lights get full power.
Mount your switch somewhere convenient but not distracting. Many people use the empty switch blanks in their dash or add an auxiliary switch panel. Label it clearly so passengers know what it controls.
Add a fuse or circuit breaker rated slightly above your light bar’s normal draw. This protects your wiring if something shorts out. It’s cheap insurance against electrical fires.
Maintenance and Adjustment
Check your mounting bolts regularly. Vibration can loosen them over time, especially on rough trails. A quick check before each trip prevents your expensive light bar from bouncing off into the bushes.
Clean your light bar lenses after muddy or dusty rides. Caked-on dirt cuts your light output significantly. A soft brush and some water usually does the trick.
Adjust your aim as needed. Light bars can shift from their original position after hard impacts or vibration. Take a few minutes to make sure they’re pointing where you need them.
Working with Professional Installers
Sure, many lighting upgrades are DIY-friendly. But sometimes it makes sense to let the pros handle it. Professional installers have the tools, experience, and knowledge to get your project done right the first time.
When to Call the Experts
Complex wiring, custom fabrication, or integration with existing systems are good reasons to hire a pro. If your project involves cutting body panels, running wires through tight spaces, or programming control modules, professional help can save you time and frustration.
Shops that specialize in custom LED car lighting Indianapolis have seen it all. They can troubleshoot problems quickly, suggest solutions you might not have considered, and often complete the work faster than you could on your own.
Many professional installers offer warranties on their work. If something goes wrong, they’ll fix it. That peace of mind is worth the installation cost for many people.
Questions to Ask Before Hiring
How long have you been installing custom lighting? Experience matters, especially for complex projects. Look for shops with a proven track record and plenty of examples of their work.
Can I see examples of similar installations? Photos or actual vehicles with lighting setups like what you want help you gauge the shop’s capabilities and style.
What brands do you recommend and why? Good installers have preferences based on reliability, performance, and customer satisfaction. They should be able to explain why they choose certain products.
What’s included in the installation cost? Make sure you understand what you’re paying for. Does it include all necessary wiring, switches, and mounting hardware? Are there any potential extra charges?
Do you offer a warranty? Know what’s covered and for how long. A solid warranty shows the shop stands behind their work.
Maintenance Tips to Keep Your Lights Shining Bright
You’ve invested time and money into your lighting setup. A little regular maintenance keeps everything working and looking great for years.
Regular Inspections
Give your lighting system a once-over every few months. Look for loose wires, corroded connections, or damaged LED strips. Catching problems early prevents complete failures and costly repairs.
Check mounting points for security. Vibration and road impacts can loosen adhesive or hardware over time. A dab of adhesive or a quick turn with a wrench keeps things tight.
Cleaning and Protection
Keep your lights clean. Dust, dirt, and road grime reduce light output and can cause premature wear. A microfiber cloth and some mild cleaner work great for most applications.
Protect exposed connections from moisture. Dielectric grease on electrical connections prevents corrosion. Heat shrink tubing or electrical tape keeps splices sealed and protected.
For underglow and off-road light bars, consider applying a protective coating to the lenses. Products designed for headlight protection work well and help prevent UV damage and scratching.
Troubleshooting Common Issues
Lights flickering? Check your connections first. Loose or corroded connections are the most common cause. Clean the contacts and make sure everything’s tight.
Sections not lighting up? Most LED strips can be cut to length, and each section operates independently. If one section fails, you can often replace just that portion without redoing the whole installation.
Remote not working? Replace the battery first (seriously, it’s usually that simple). If that doesn’t fix it, check that the receiver is getting power and that nothing’s blocking the signal.
Taking Your Build to the Next Level
Once you’ve got the basics down, there are endless ways to expand and improve your lighting setup. Here are some ideas to consider.
Smart Controls and Integration
Modern lighting controllers let you do amazing things. Sync your lights to music, create custom color patterns, or control everything from your smartphone. Some systems even integrate with your vehicle’s existing electronics for seamless operation.
Voice control is becoming more common too. Imagine telling your car to change the interior lighting color or turn on your underglow without touching anything.
Layering Different Lighting Types
Combining different lighting styles creates depth and interest. Interior car lights paired with underglow give you a complete package. Add some accent lighting in the engine bay or trunk, and your whole vehicle becomes a rolling light show.
For trucks, combine bed lighting, underglow, and off-road light bars for maximum versatility. Each serves a different purpose but works together to create a cohesive look.
Seasonal and Event-Specific Setups
Some enthusiasts change their lighting schemes for different seasons or events. Holiday colors, team colors for game day, or special patterns for car shows keep things fresh and fun.
Programmable controllers make this easy. Save different color schemes and patterns, then switch between them with a button press or tap on your phone.
Making Smart Buying Decisions
With so many lighting products available, how do you choose? Here’s what to look for when shopping for custom LED car lighting Indianapolis or any other lighting upgrades.
Quality Over Price
Cheap lighting kits are tempting, but they rarely last. Low-quality LEDs fade quickly, waterproofing fails, and you end up replacing everything sooner than you’d like. Spending a bit more upfront for quality products saves money and hassle in the long run.
Look for products with good reviews from actual users. Pay attention to comments about longevity, brightness, and customer service. Real-world feedback tells you more than marketing claims.
Compatibility with Your Vehicle
Make sure the lighting kit you’re buying works with your specific vehicle. Some products are designed for certain makes and models, while others are universal. Universal kits offer more flexibility but might require additional mounting hardware or modifications.
Check power requirements too. Your vehicle’s electrical system needs to handle the additional load from your lighting. Most modern vehicles can support typical lighting upgrades without issues, but it’s worth verifying.
Expandability and Upgrades
Choose systems that allow you to add more lights or features later. Starting with a basic setup and expanding over time spreads out the cost and lets you refine your design as you go.
Look for brands that offer a range of compatible products. This makes it easier to add components without worrying about whether they’ll work together.
Building Your Dream Setup
You’ve got the knowledge. You know what’s legal, what looks good, and how to install it. Now it’s time to plan your perfect lighting setup.
Start with a Vision
What do you want your finished vehicle to look like? Sleek and modern? Bold and eye-catching? Subtle and sophisticated? Having a clear vision helps you make consistent choices about colors, placement, and style.
Collect inspiration from car shows, online forums, and social media. Save photos of setups you like and note what specifically appeals to you. This creates a reference library for your own build.
Create a Plan
Map out where you want lights and what type you’ll use in each location. Sketch it out or use a photo of your vehicle to mark placement. This helps you visualize the finished product and identify any potential issues before you start buying parts.
Make a budget and prioritize. You don’t have to do everything at once. Start with the most important elements and add more as time and money allow.
Gather Your Tools and Parts
Having everything you need before you start makes the installation go much smoother. Basic tools like wire strippers, crimpers, zip ties, and electrical tape handle most installations. More complex projects might require additional tools or specialty items.
Buy a bit more wire and connectors than you think you’ll need. It’s frustrating to be halfway through an installation and realize you’re a few feet short on wire.
Take Your Time
Rushing leads to mistakes. Set aside enough time to do the job right. If you’re doing it yourself, a weekend is usually plenty for most lighting projects. Professional installations might take a day or two depending on complexity.
Don’t be afraid to ask for help or advice. Online forums, YouTube tutorials, and local car clubs are full of people who’ve done similar projects and are usually happy to share tips.
Your Ride, Your Style
Custom lighting lets you express yourself and make your vehicle truly unique. Whether you’re adding subtle interior car lights for practical illumination or going all-out with LED underglow installation and off-road light bars, the result is a ride that stands out from the crowd.
Remember to keep it legal, choose quality products, and take your time with installation. The effort you put in now pays off every time you fire up those lights and see heads turn.
Ready to light up your ride? Start planning your custom LED car lighting Indianapolis project today. Your perfect setup is waiting, and the road ahead is looking bright.